An expert guide to making your own tapered candles at home
04/09/2021Impressive candles are one of the most popular Instagram trends growing among home and interiors influencers. We called upon an expert to teach you the skills and techniques to make your own tapered candles at home.
Welcome to The Curiosity Academy, Stylist’s new learning hub where you can access workshops, how-to guides, new research and learn the most up-to-date skills from the UK’s most in-the-know people.
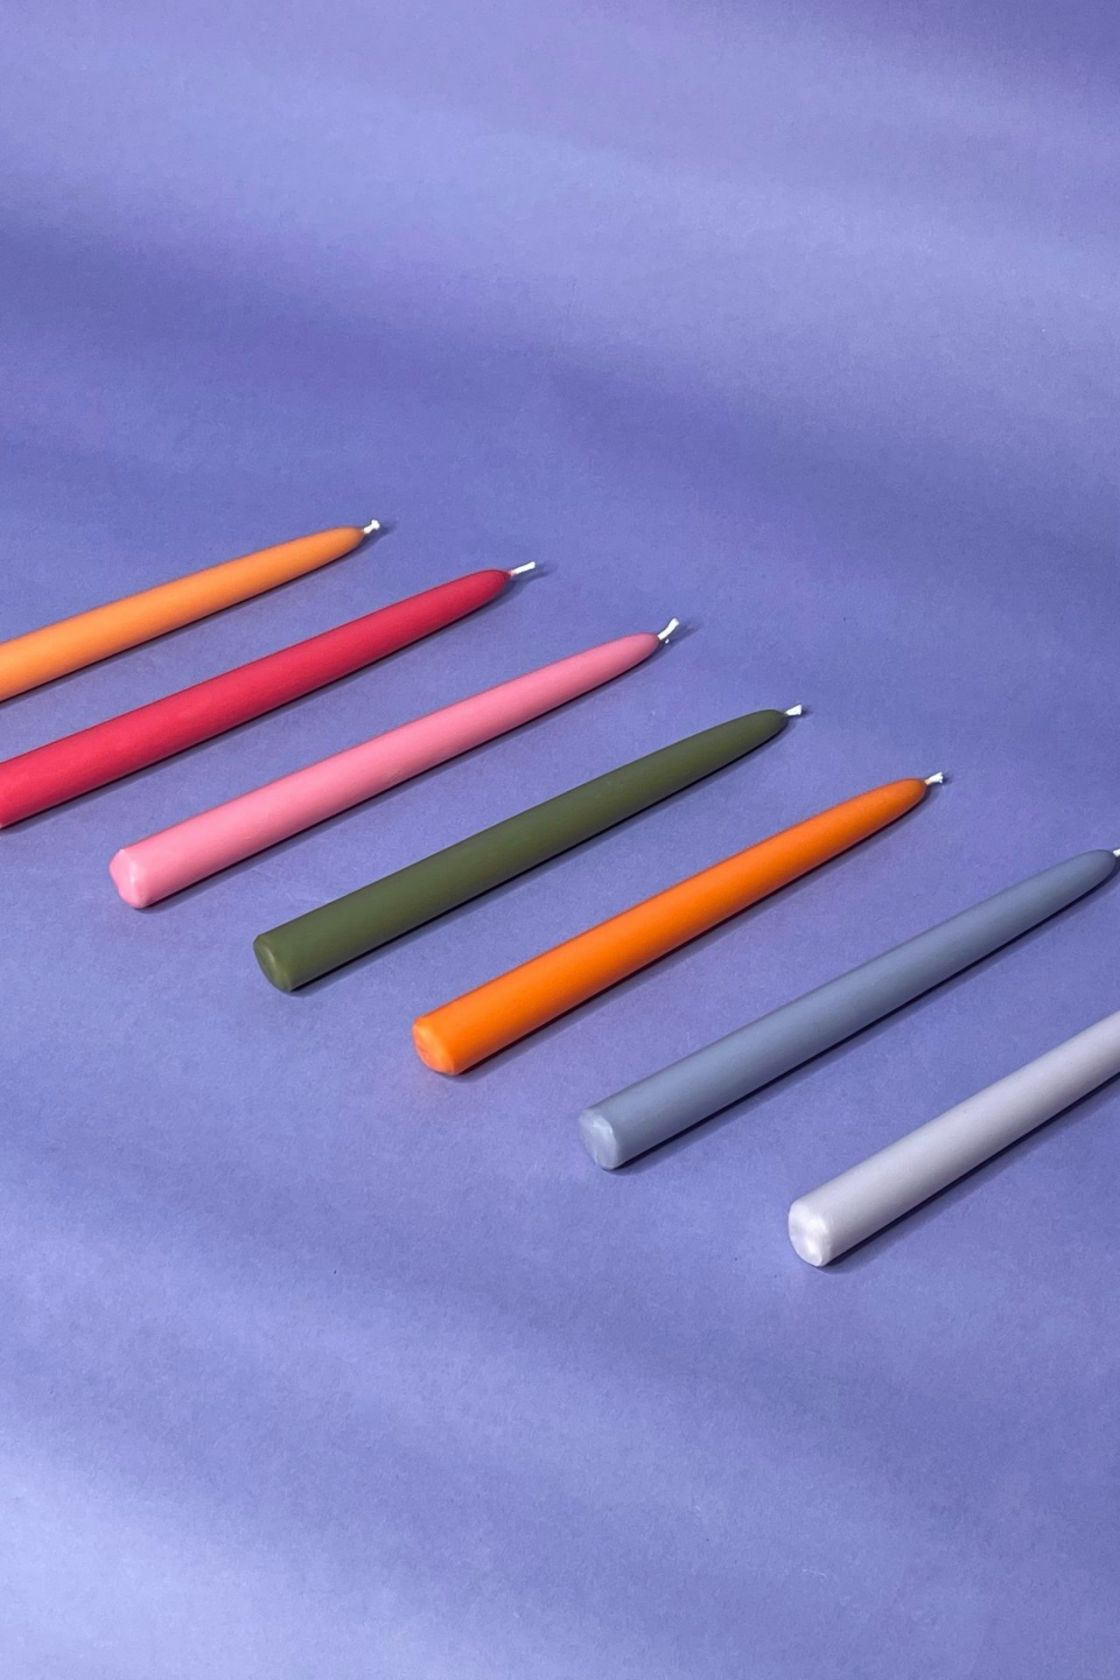
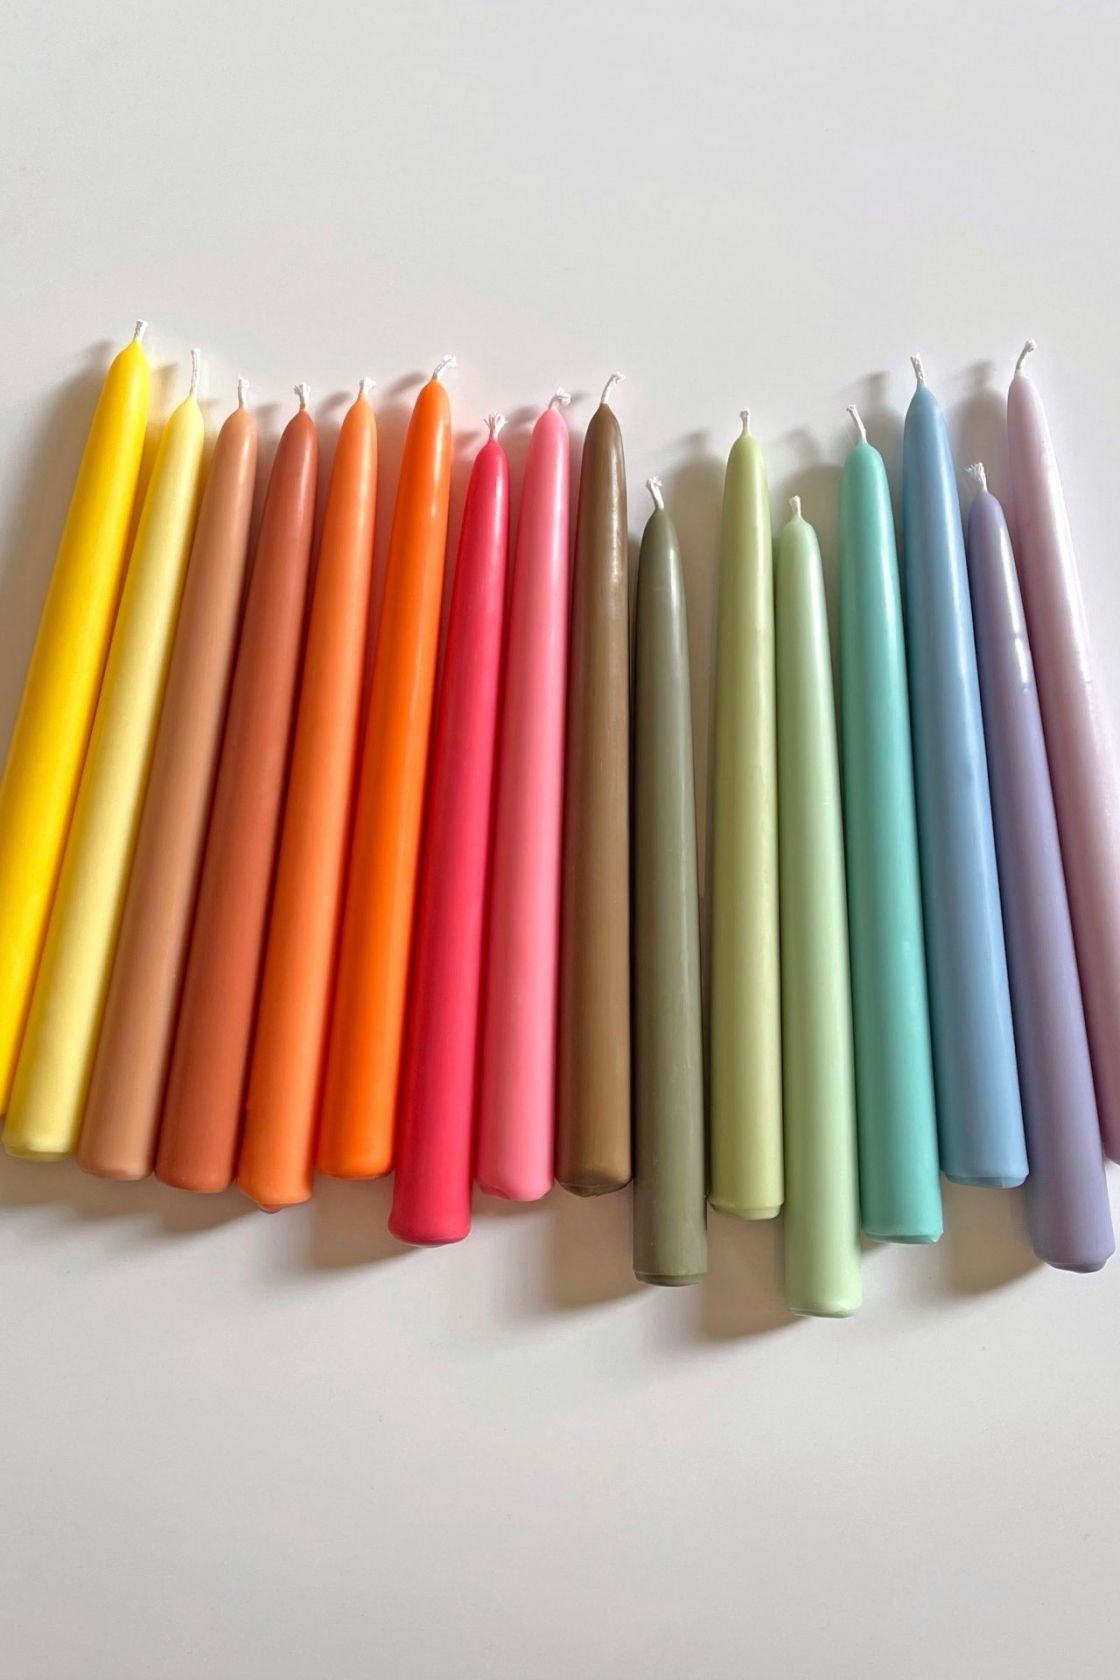
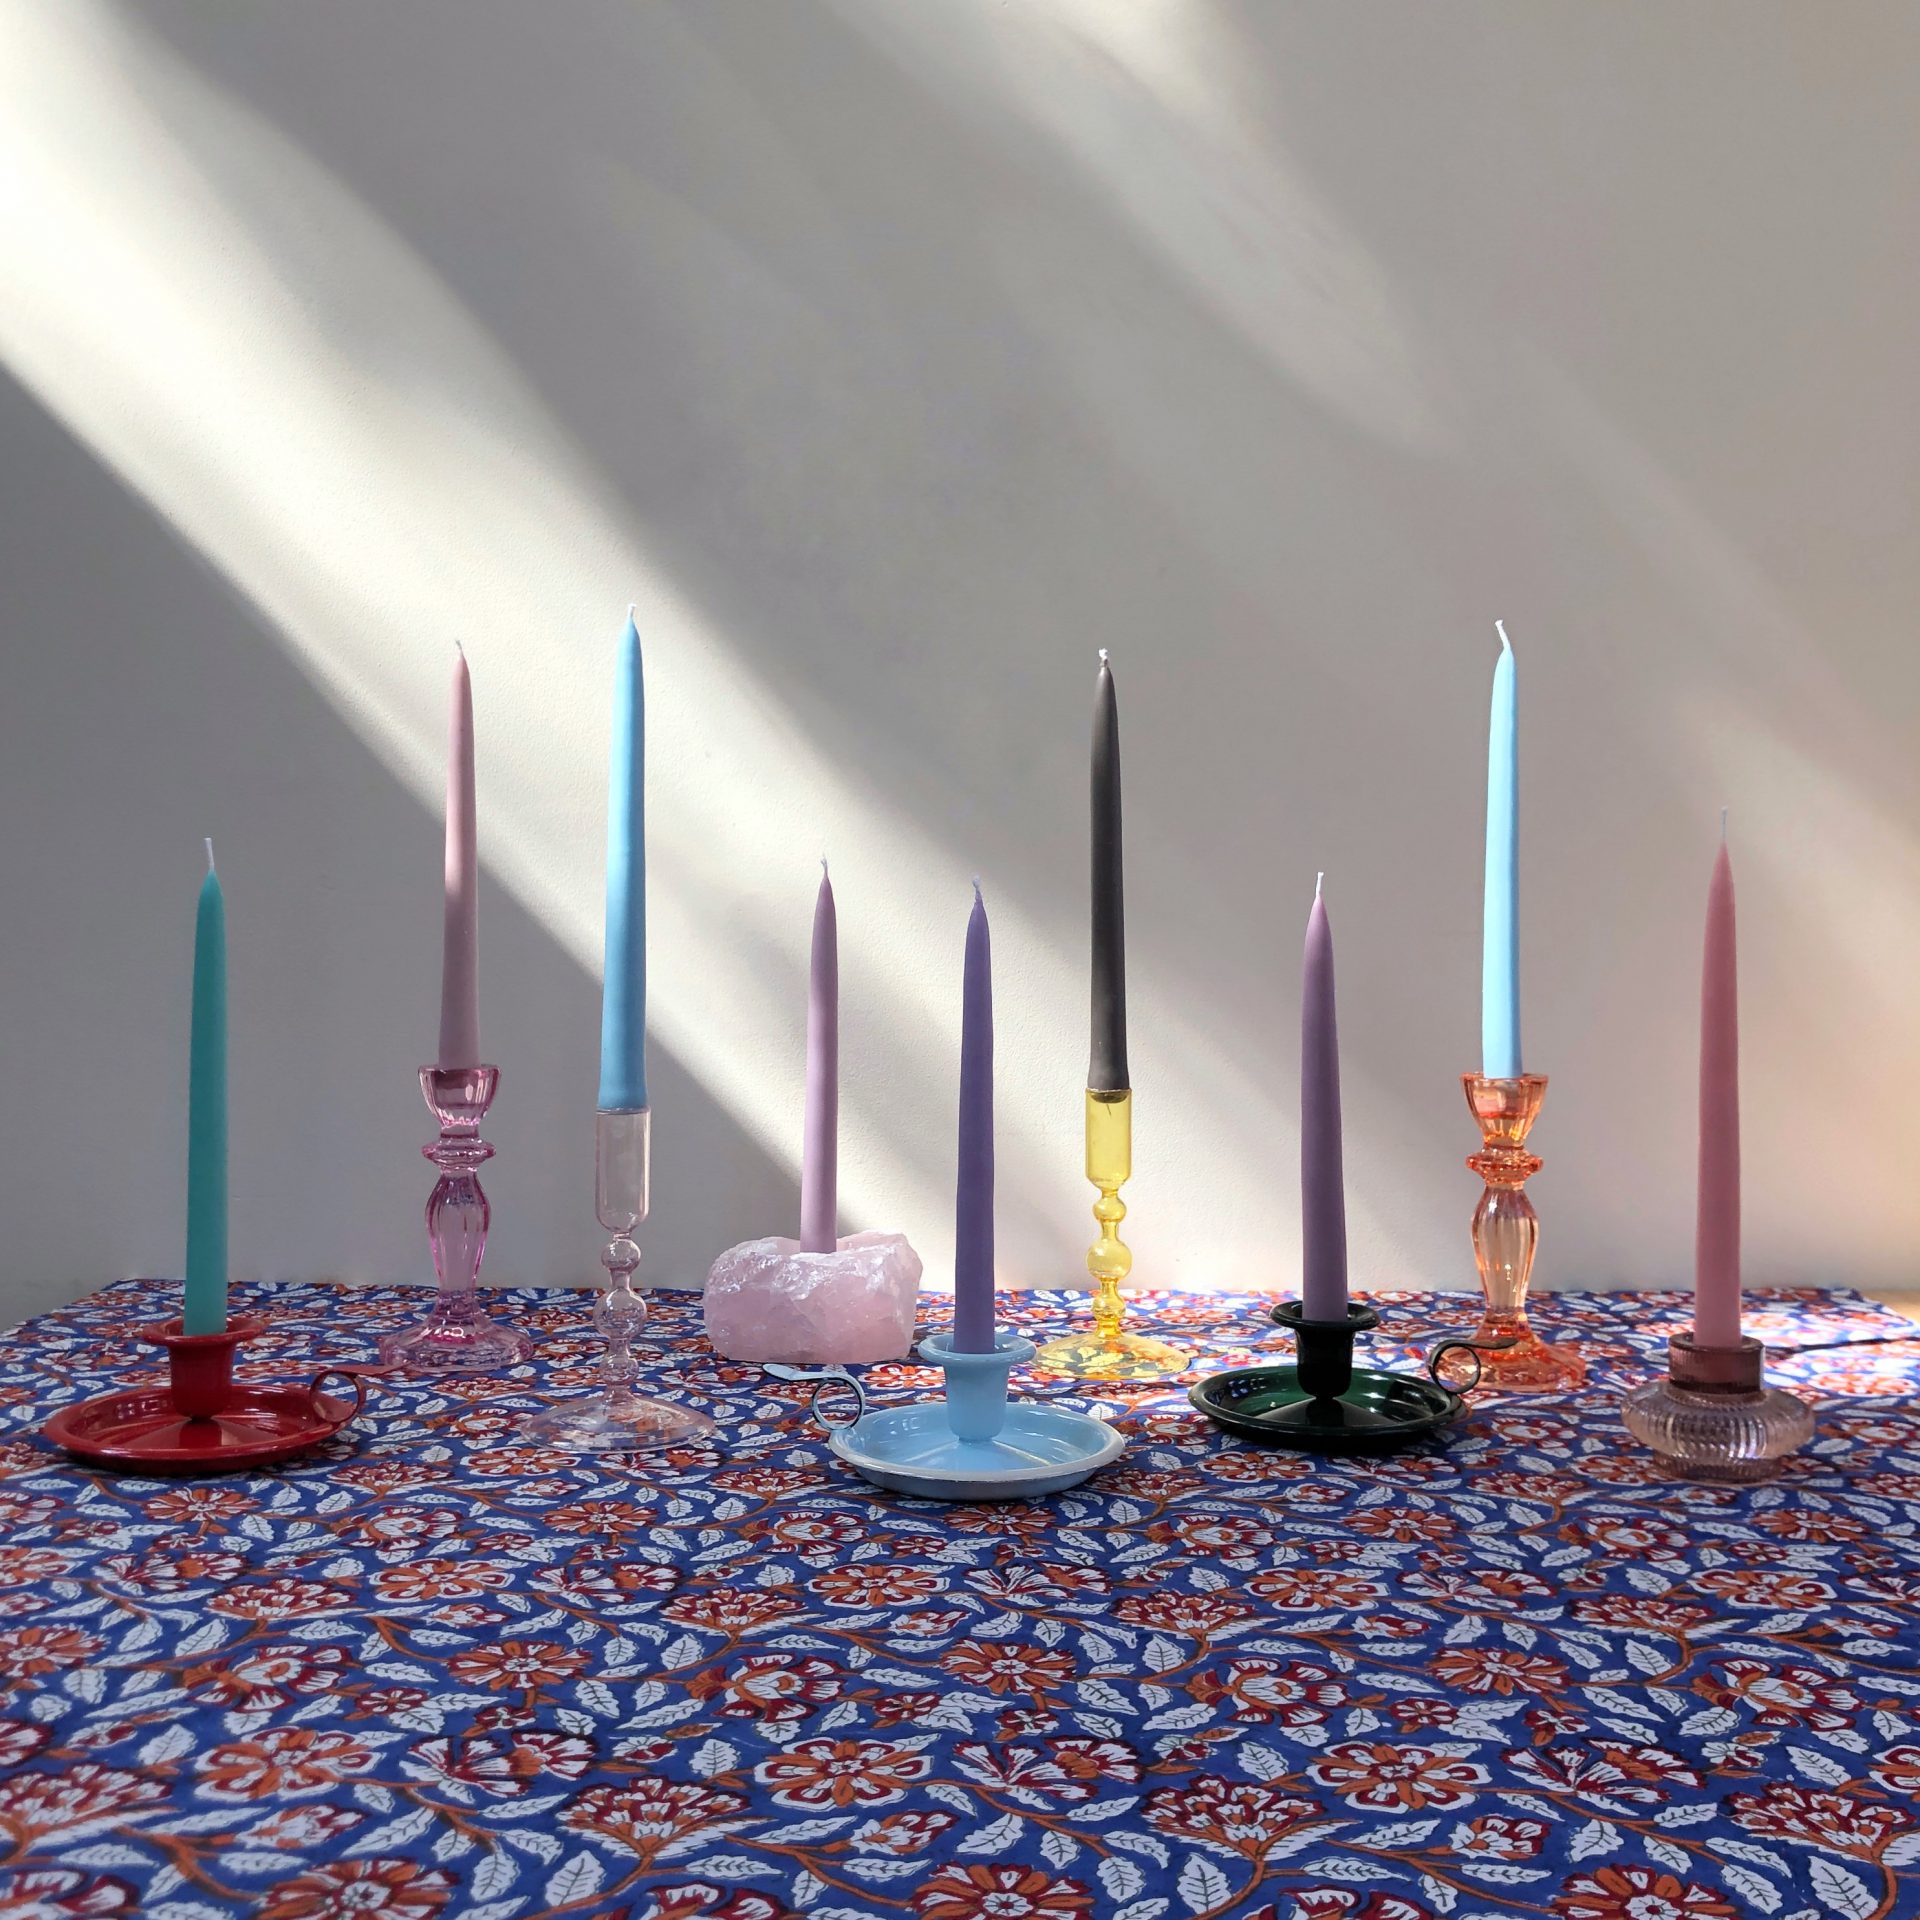
Over the past year, the tapered candle quickly became Instagram’s favourite way to dress a dinner table, mantlepiece or nightstand. Independent brands have stocked chic tapered candles in a variety of colours and designs. Influencers have flaunted intricate styles and collections as the finishing touch to an elevated interior. And as the trend continues to grow with our appetite for craft and homeware, we’ve called upon an expert to teach you how to make candles for yourself.
Tony Jack, founder of the candle brand Fairholme, started his business during the first lockdown in the UK after being furloughed from his job in PR and was looking for a new hobby. He started candle making with a small packet of soy wax and a Lucozade bottle. One year on, he now runs his own business selling uniquely colourful candles that are constantly selling out.
You may also like
Hand-painted dinner and sculptural candles is Instagram’s biggest interior trend
What you will need:
- A tall glass jar or a steel bucket
- Beeswax or soy wax (1kg should comfortably make approx. 6 candles)
- 6 bleached candle wicks
- A large pan
- A wax melting pot, or a small heat-resistant pan, bowl or jug
- Soy dye (optional)
How to make a tapered candle:
- Fill the large pan with hot water and bring to the boil
- Pour your wax into the melting pot (or smaller pan/bowl) with the soy dye if you want to add colour to your candles. Rest above the boiling water, like a bain-marie, until all of the wax has melted
- Meanwhile, place your bucket or glass jar in a body of hot water (the kitchen sink will do) to heat it up – this will help the wax from cooling down too quickly
- Trim your wicks to the desired length of your taper candles. Be careful to leave lots of extra space for you to safely hold the wick without coming into contact with any hot wax, and an extra 2cm that will remain to be lit once the candle is made
- One at a time, carefully dunk your wicks into the wax, and hold submerged in the wax until air bubbles appear
- When the air bubbles have stopped entirely, remove the wick from the wax, ensuring they’re covered in wax, and straighten them out by hand. Repeat for all of your wicks
- When each wick has been dunked in the hot wax, pour the remaining wax into your warm bucket/jar and leave for up to two minutes. You now need the wax at a slightly cooler temperature so that it can build up on the wicks
- Now, take one of your coated wicks and gently dip it in and out of the wax a couple of times so that the lengths (save for the space you’re using to hold them and the 2cm for burning) are completely coated in a new layer of wax. Repeat for each wick
- After this second round of dunking in the wax, hang them on a drying rack (or somewhere where they won’t be disturbed or smudged!) and leave to completely cool.
- When the candles have cooled, repeat step 8 and 9 as frequently as it takes for the wax to build up to the desired thickness of your tapered candle. For 6 candles, this should take roughly around 45 minutes but be patient and allow each candle to cool properly between dips
- When they’ve reached the desired thickness, leave your candles to dry for 12 hours
- When dry, cut the wick down to the desired length and use a Stanley knife to straighten off the base of the candle

Tony’s top tips for making candles at home
Research is key
“It can all be quite confusing,” Tony says. “So take your time to learn. I made my first few batches with a wick that got discontinued shortly after and when I tried creating the same candles with a different wick, they looked completely different.”
Tony also recommends that you research every item you need before buying it to avoid purchasing too many materials that you won’t end up using.
Don’t be afraid to fail
“I think I made around 100 candles until they found the form you see today,” Tony admits. “They were lumpy and bumpy but it’s all in the technique.”
Tony explains that the temperature of the wax, the temperature of the room you’re in, and the angle that you dip your candle all make a difference to the end result. You may not be happy with the first candle you make, but improving your technique is part of the fun.
“I was very critical of my work at the start. If the candles were a bit wonky or leaned to the left a little, I would melt them down and start again,” says Tony. “But my sister convinced me that that’s the charm of handmade products.”
Set up a safe workspace
Dealing with hot wax can be dangerous if you’re not careful, Tony warns. “Get yourself a thick apron, keep everything clean and tidy and ensure all surfaces are covered and protected,” is his advice.
Tony also recommends buying a mat for your floor as your candles will drip and he explains that it is also essential to keep the room well ventilated.
Avoid adding scents to tapered candles
“I don’t think taper candles should be scented as they’re usually enjoyed with a meal or around mealtime and they should add to the look and feel of the tablescape, not dominate it,” Tony explains.
Other candle shapes work better if you are looking to make your own scented candles.
Read more about how you can use tapered candles to up your tablescaping game at Stylist.co.uk.
Tony Jack, founder of Fairholme

How to make tapered candles with Tony Jack Tony Jack founded the candle brand Fairholme during lockdown in 2020 and his colourful dinner candles have been in high-demand ever since. Tony has collaborated with brands including Kitri and Missoma as part of growing Fairholme and the brand has been an integral part of the growth of Instagram’s tablescaping trend.
Source: Read Full Article