A florist’s guide to making a chic, seasonal autumn wreath
09/24/2021Written by Alice Porter
Wreaths don’t have to be exclusive to Christmas. In fact, they’re the perfect autumn accessory for your home. Here’s an easy guide to making one from scratch.
As summer officially draws to a close, many of us will be looking forward to the novelties of autumn. Brown leaves decorating the ground, cosy nights sat in front of Netflix and that one fluffy jumper you reach for to throw on top of every outfit.
Christmas is still a few months away but that doesn’t mean you can’t start decorating your home with the change in season. In fact, autumn wreaths are set to become just as popular as their traditional festive counterparts this year, with the online marketplace Etsy seeing a 383% increase in searches for dry flower wreaths.
Making your own wreath is the perfect way to spend an October afternoon. It’s creative, simple and relaxing and you’ll be left with a beautiful, bespoke decoration for your home.
We asked Anna Forster, the founder of Liverpool-based florist Mary Mary Florals, to share a simple guide to making an autumn wreath that you can follow step-by-step at home.
How to make an autumn wreath
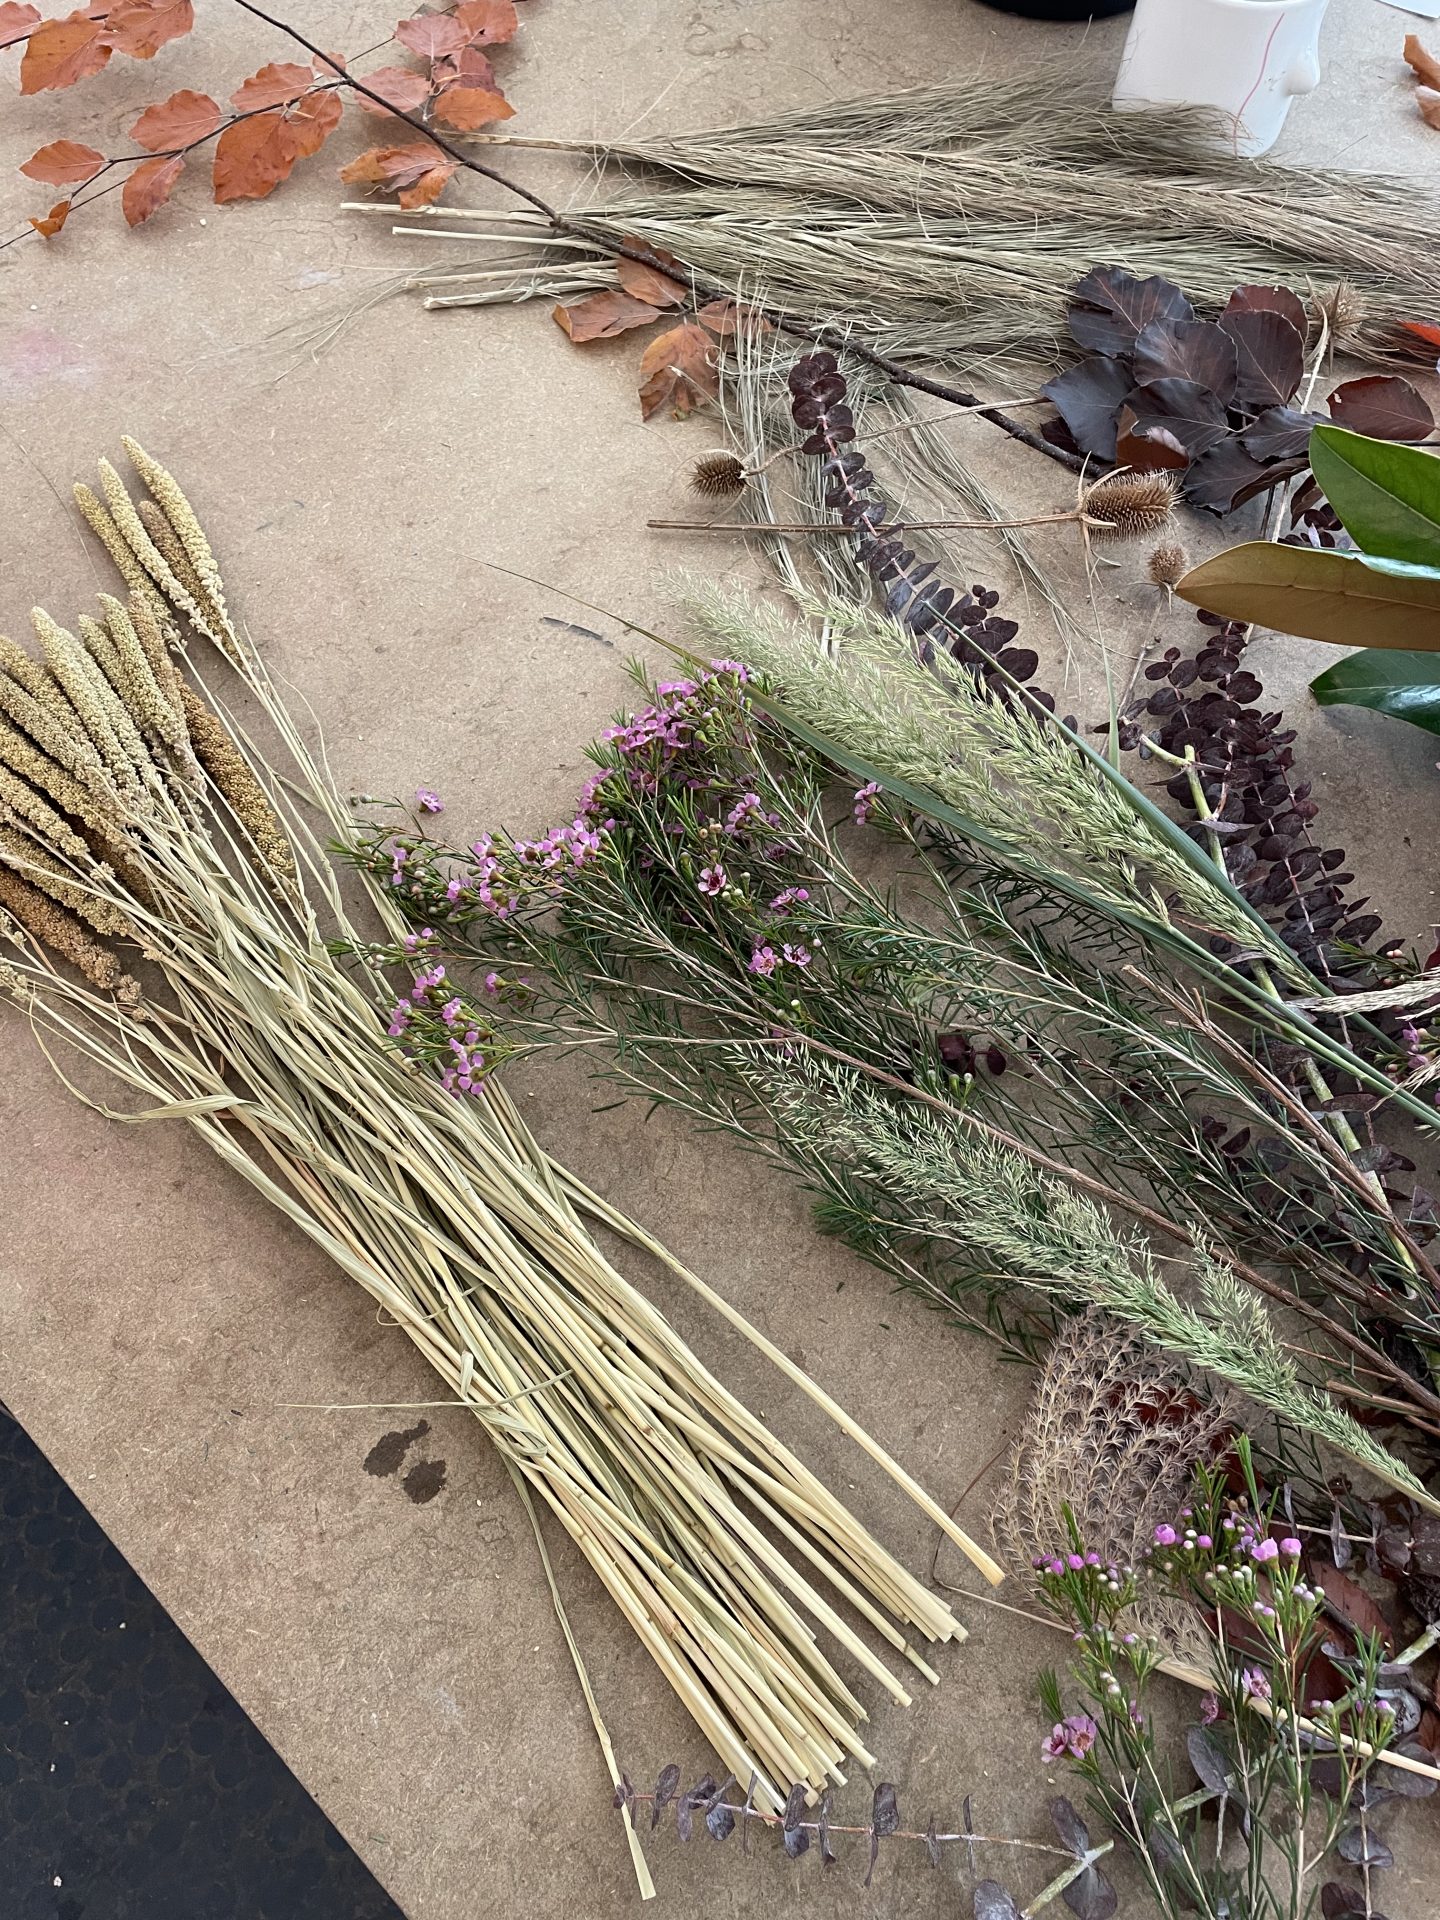
What you will need
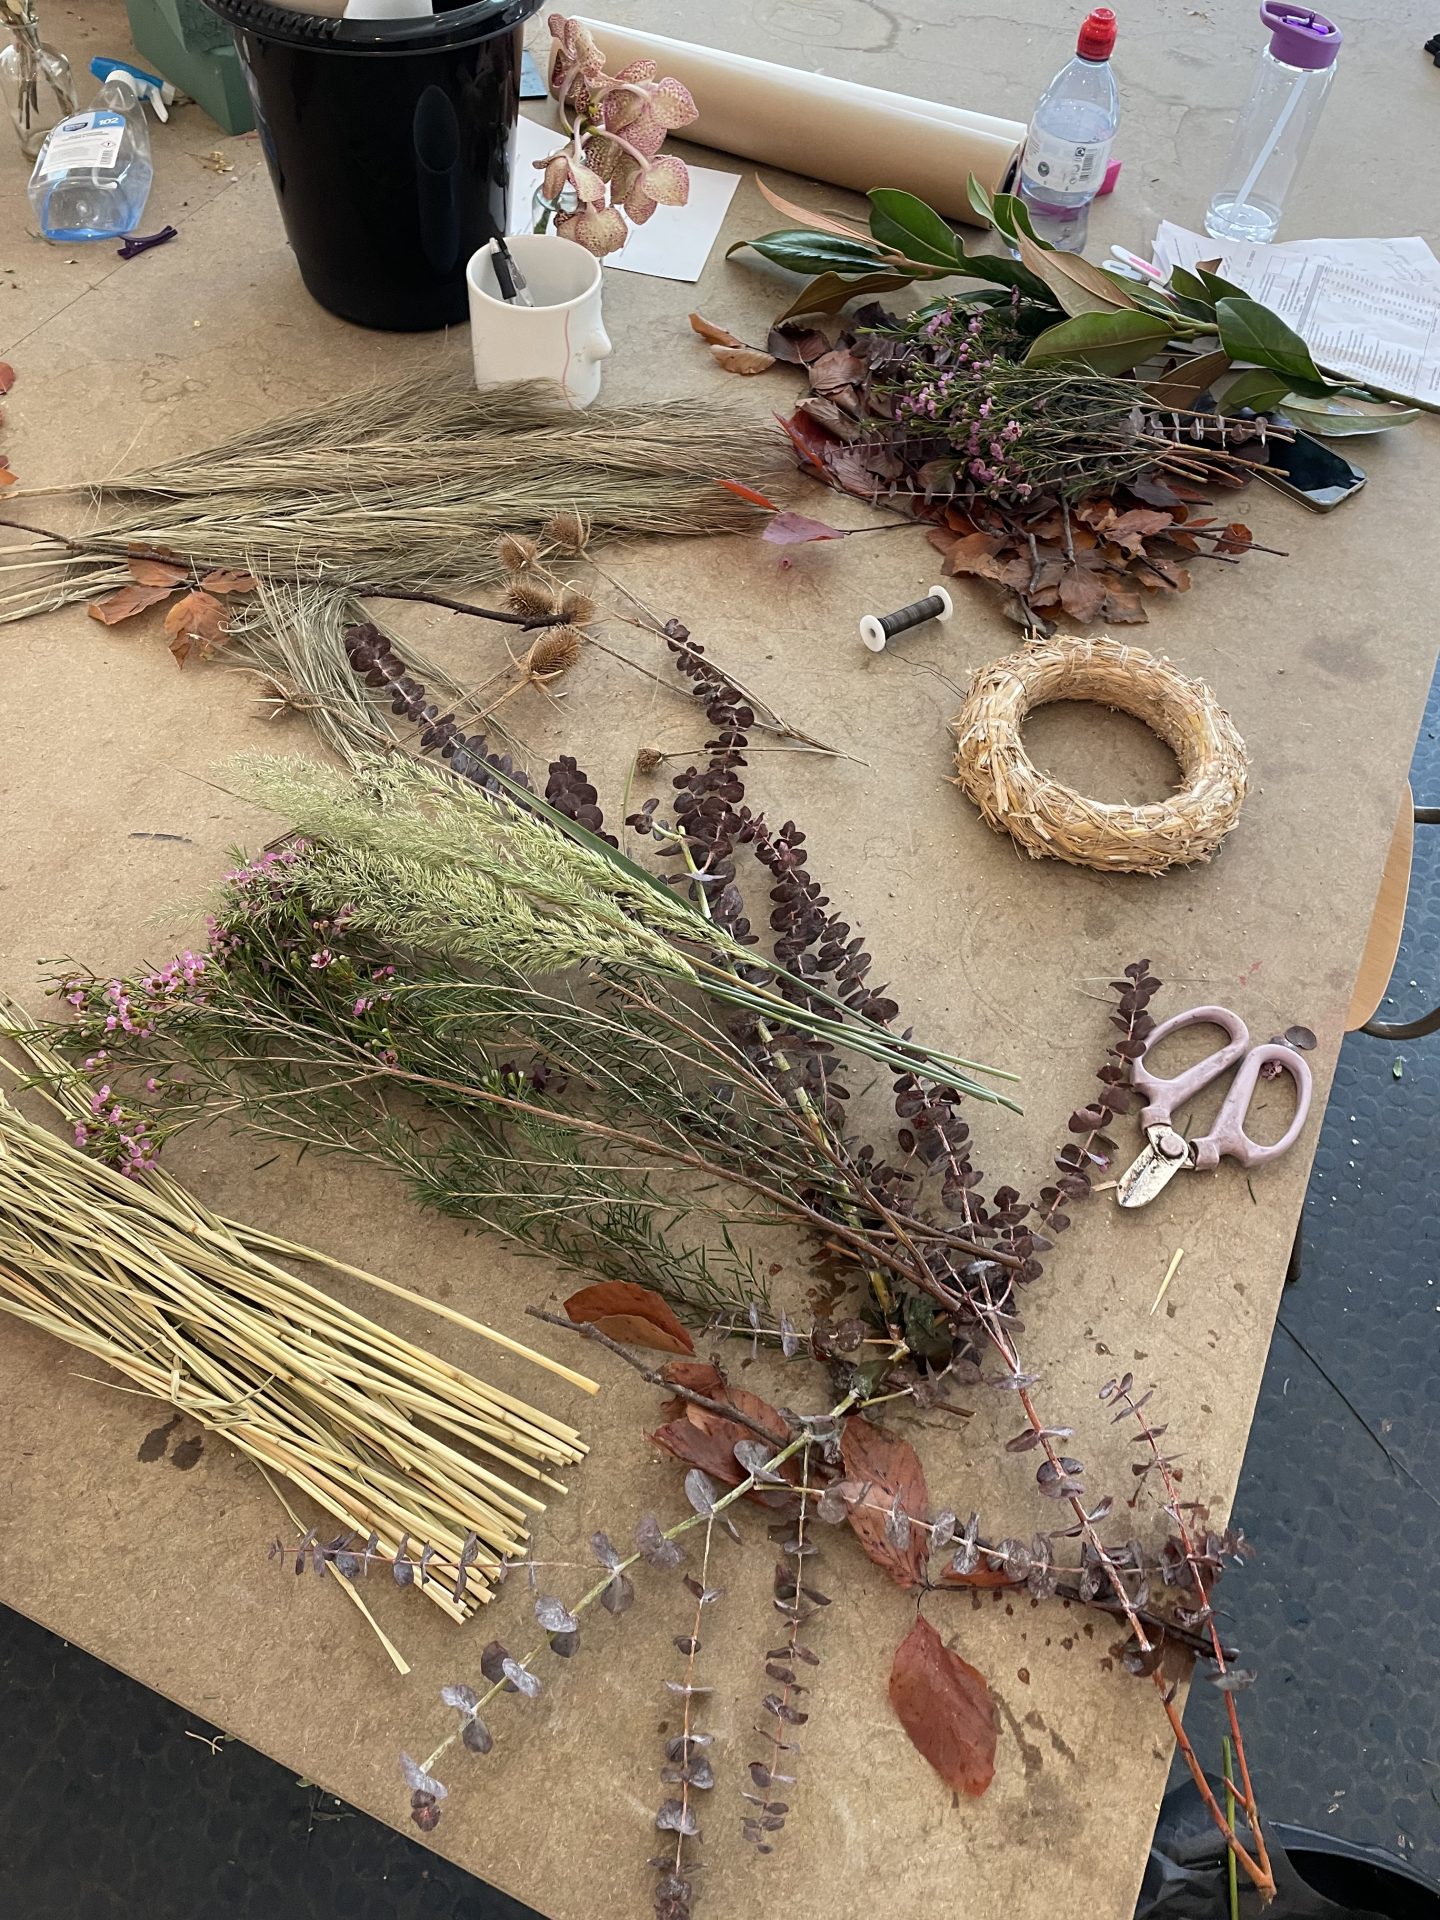
Everything you need to make an autumn wreath. - Floral scissors
- Floral wire
- Straw wreath base
- Greenery
- 3-5 types of fresh or dried flowers
- String (optional)
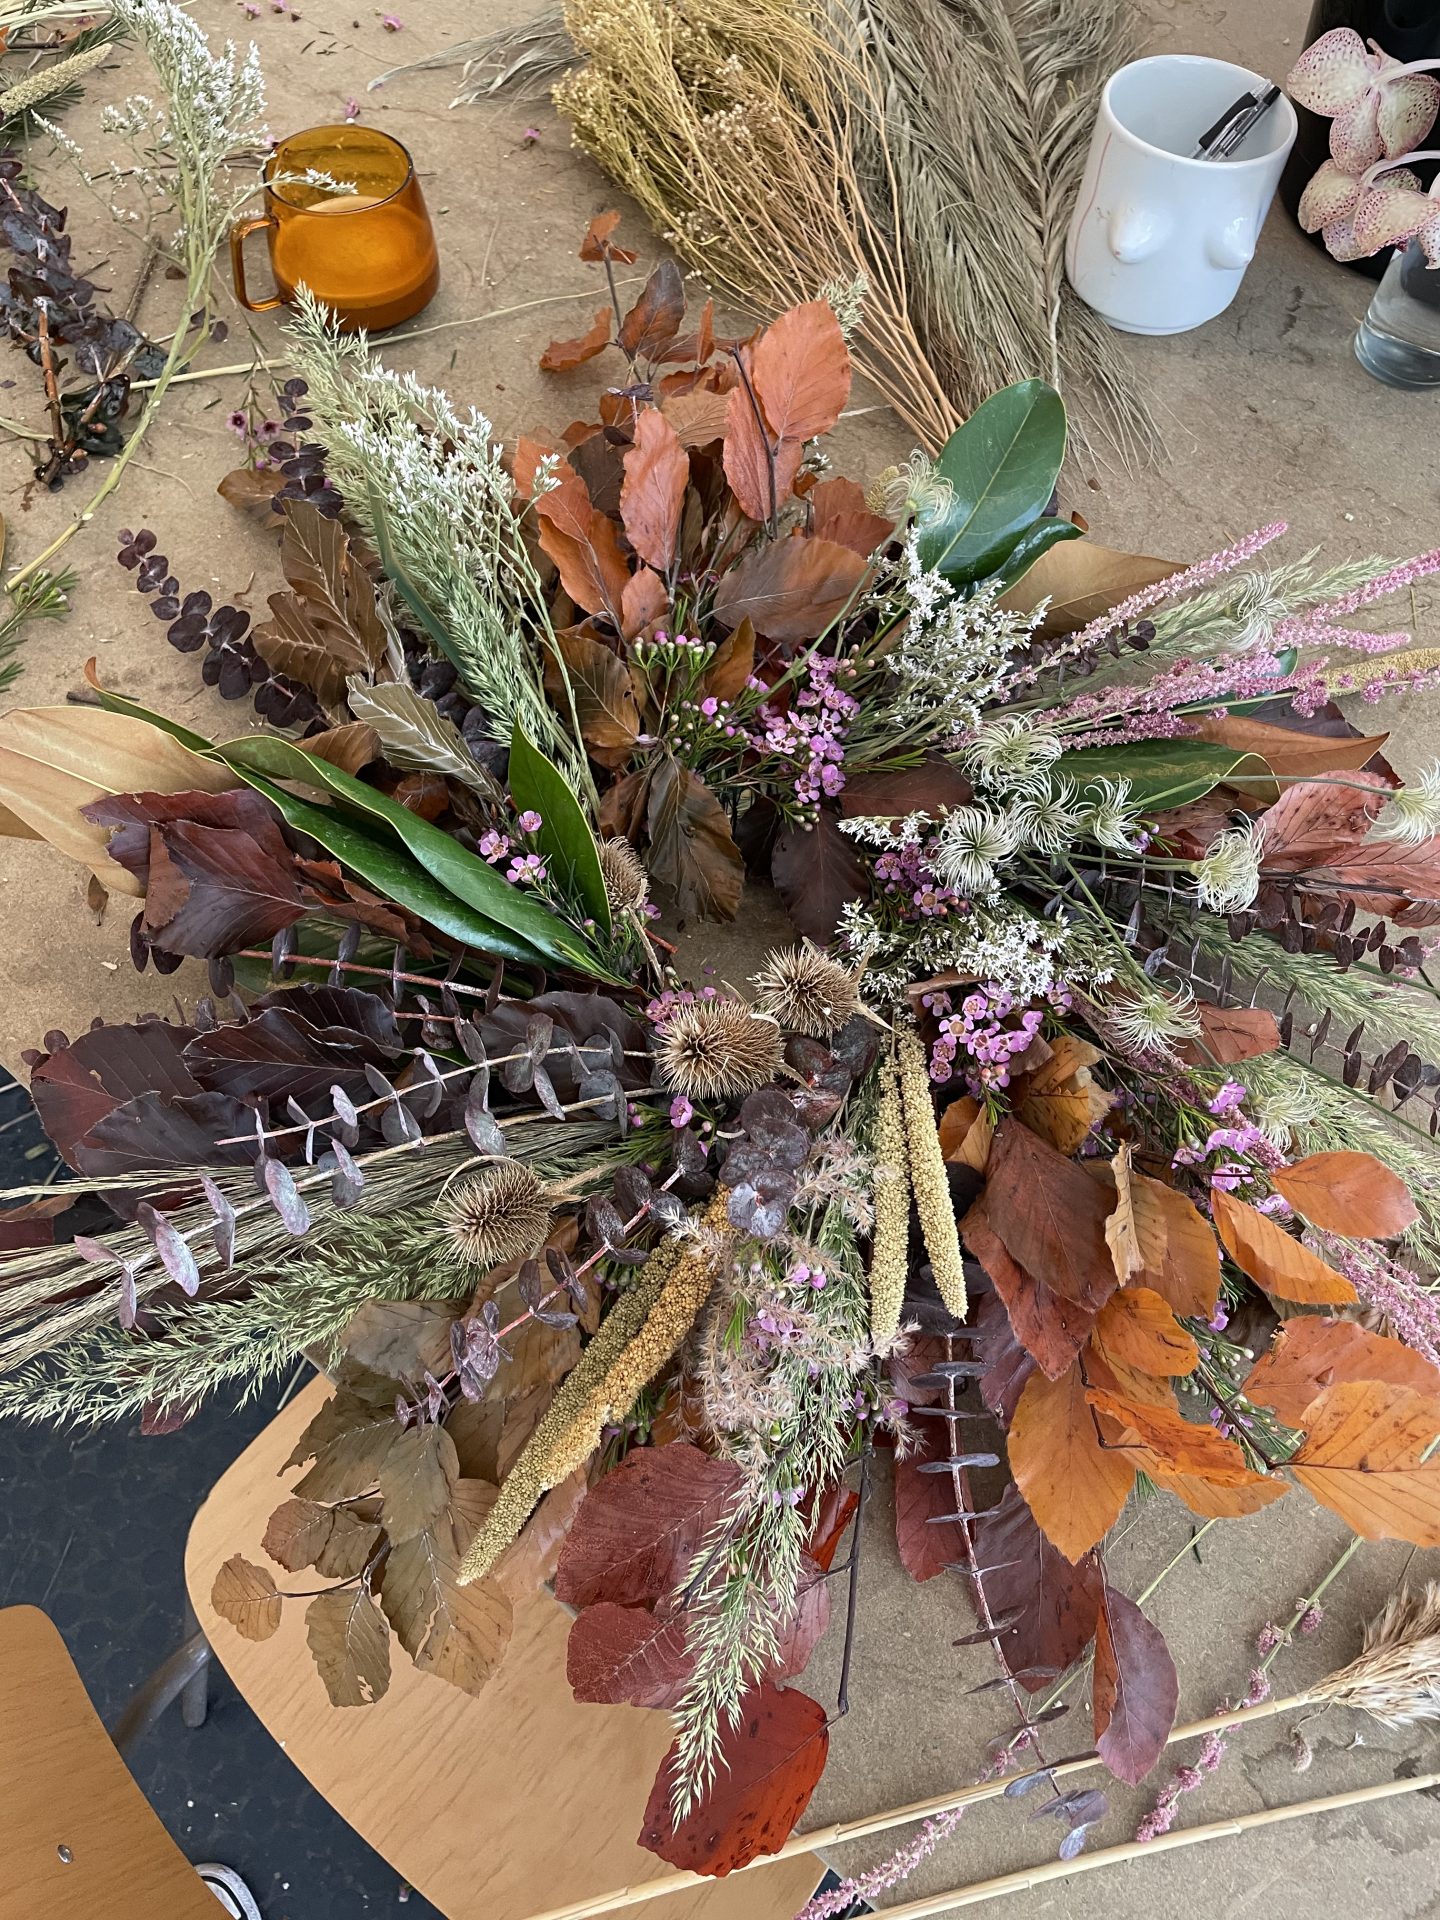
1. Start with your greenery.
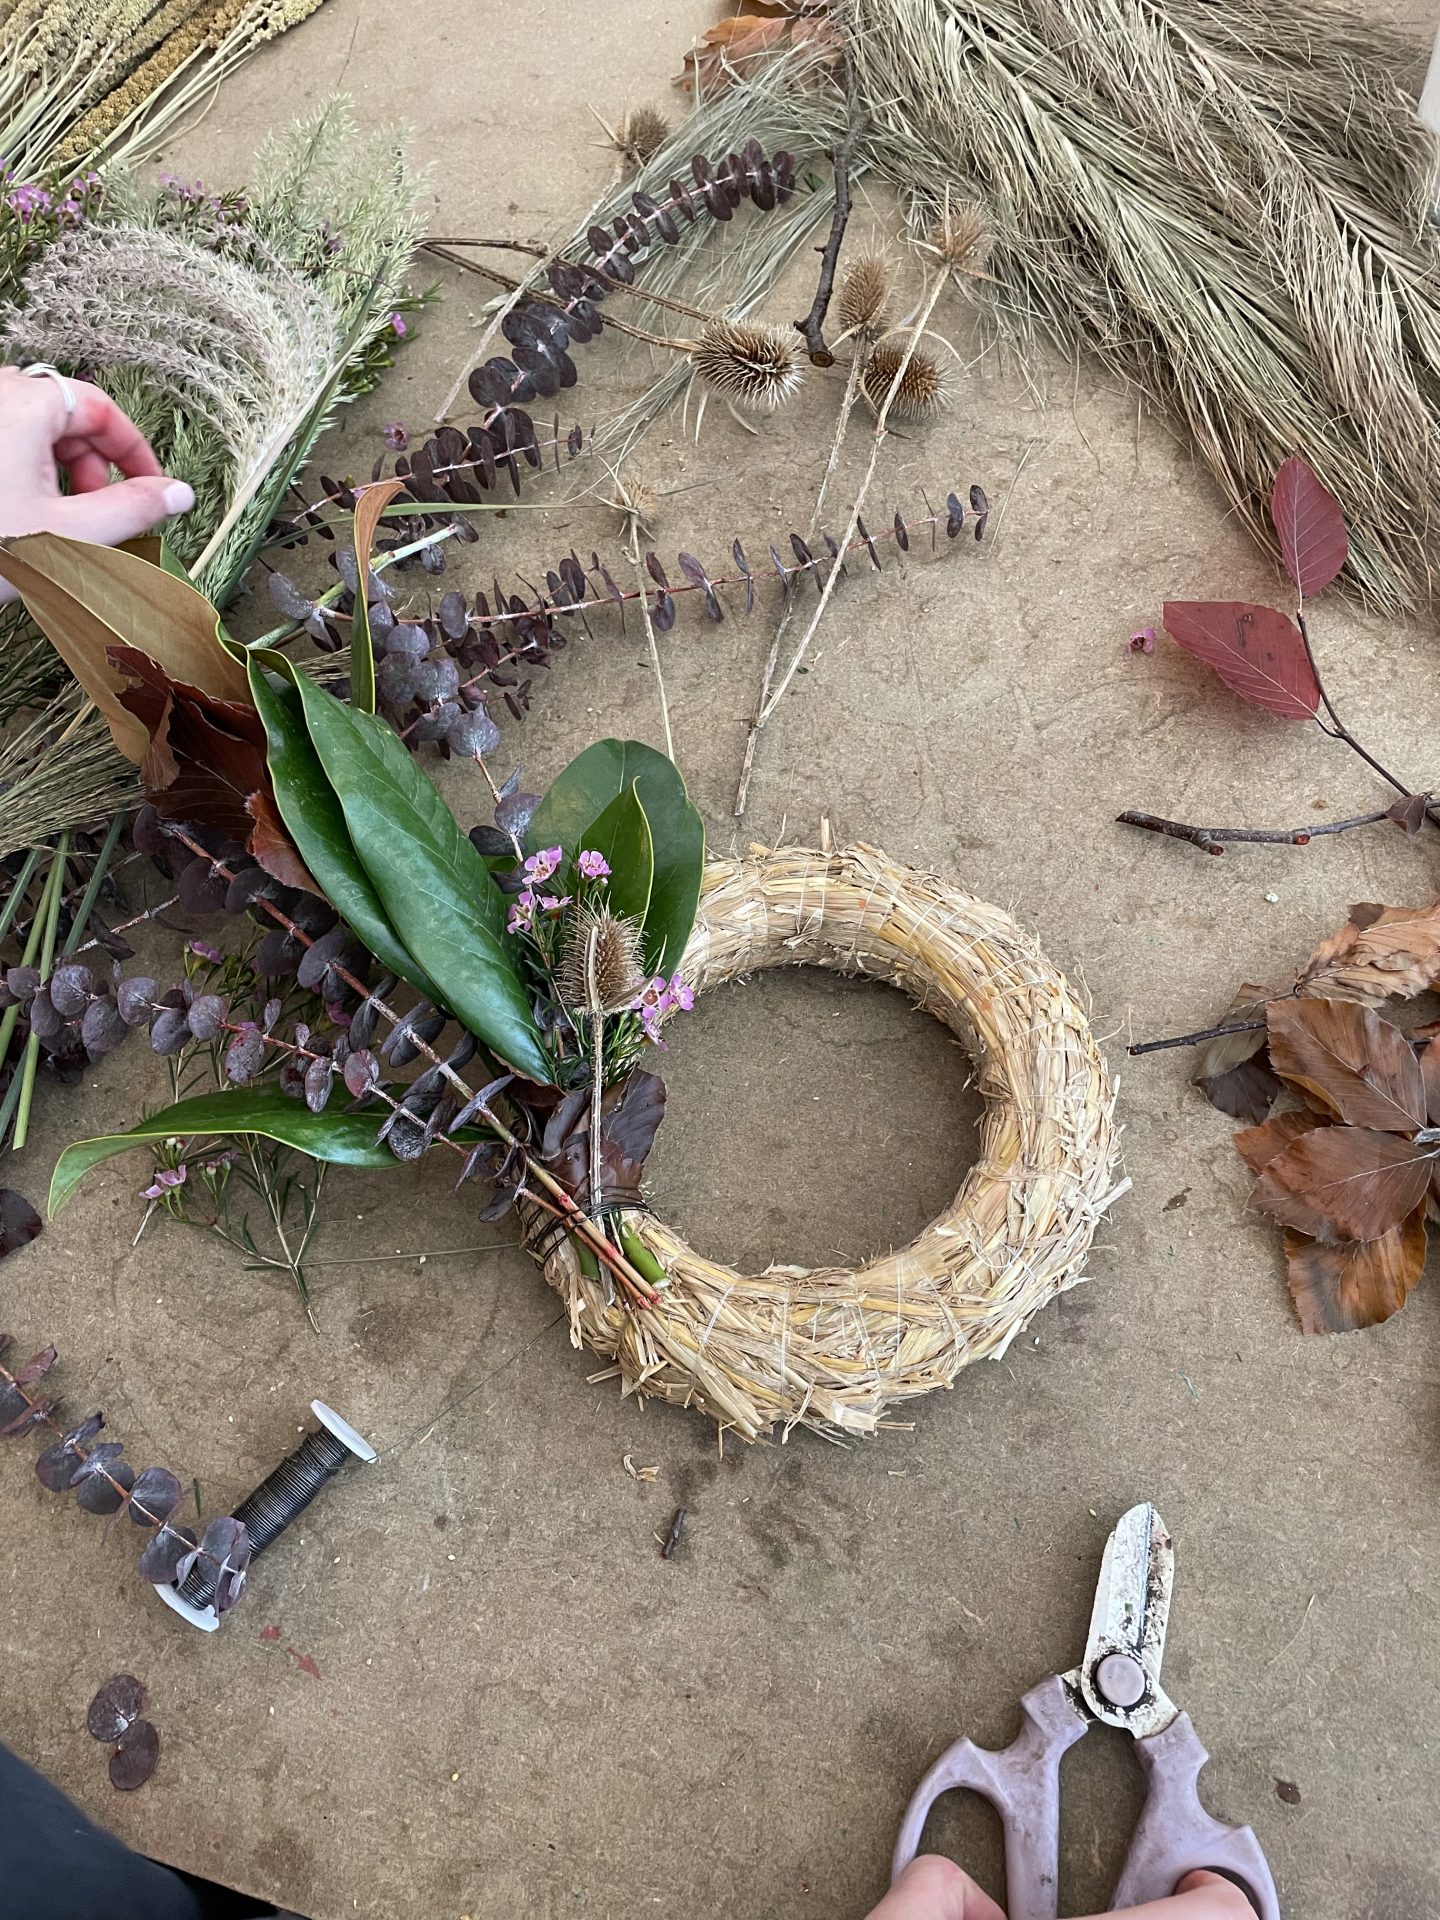
Start with your greenery Cut your greenery to size by holding it against the wreath base and figuring out the size you’d like it to be (somewhere around 30cm is ideal). Add a few leaves of greenery to one area and attach to the wreath by wrapping flower wire around them. Continue wrapping the wire around each piece of greenery you add.
2. Start to add your foliage.
Start to add foliage. Add your fresh and dried flowers, attaching them with the same reel of wire.
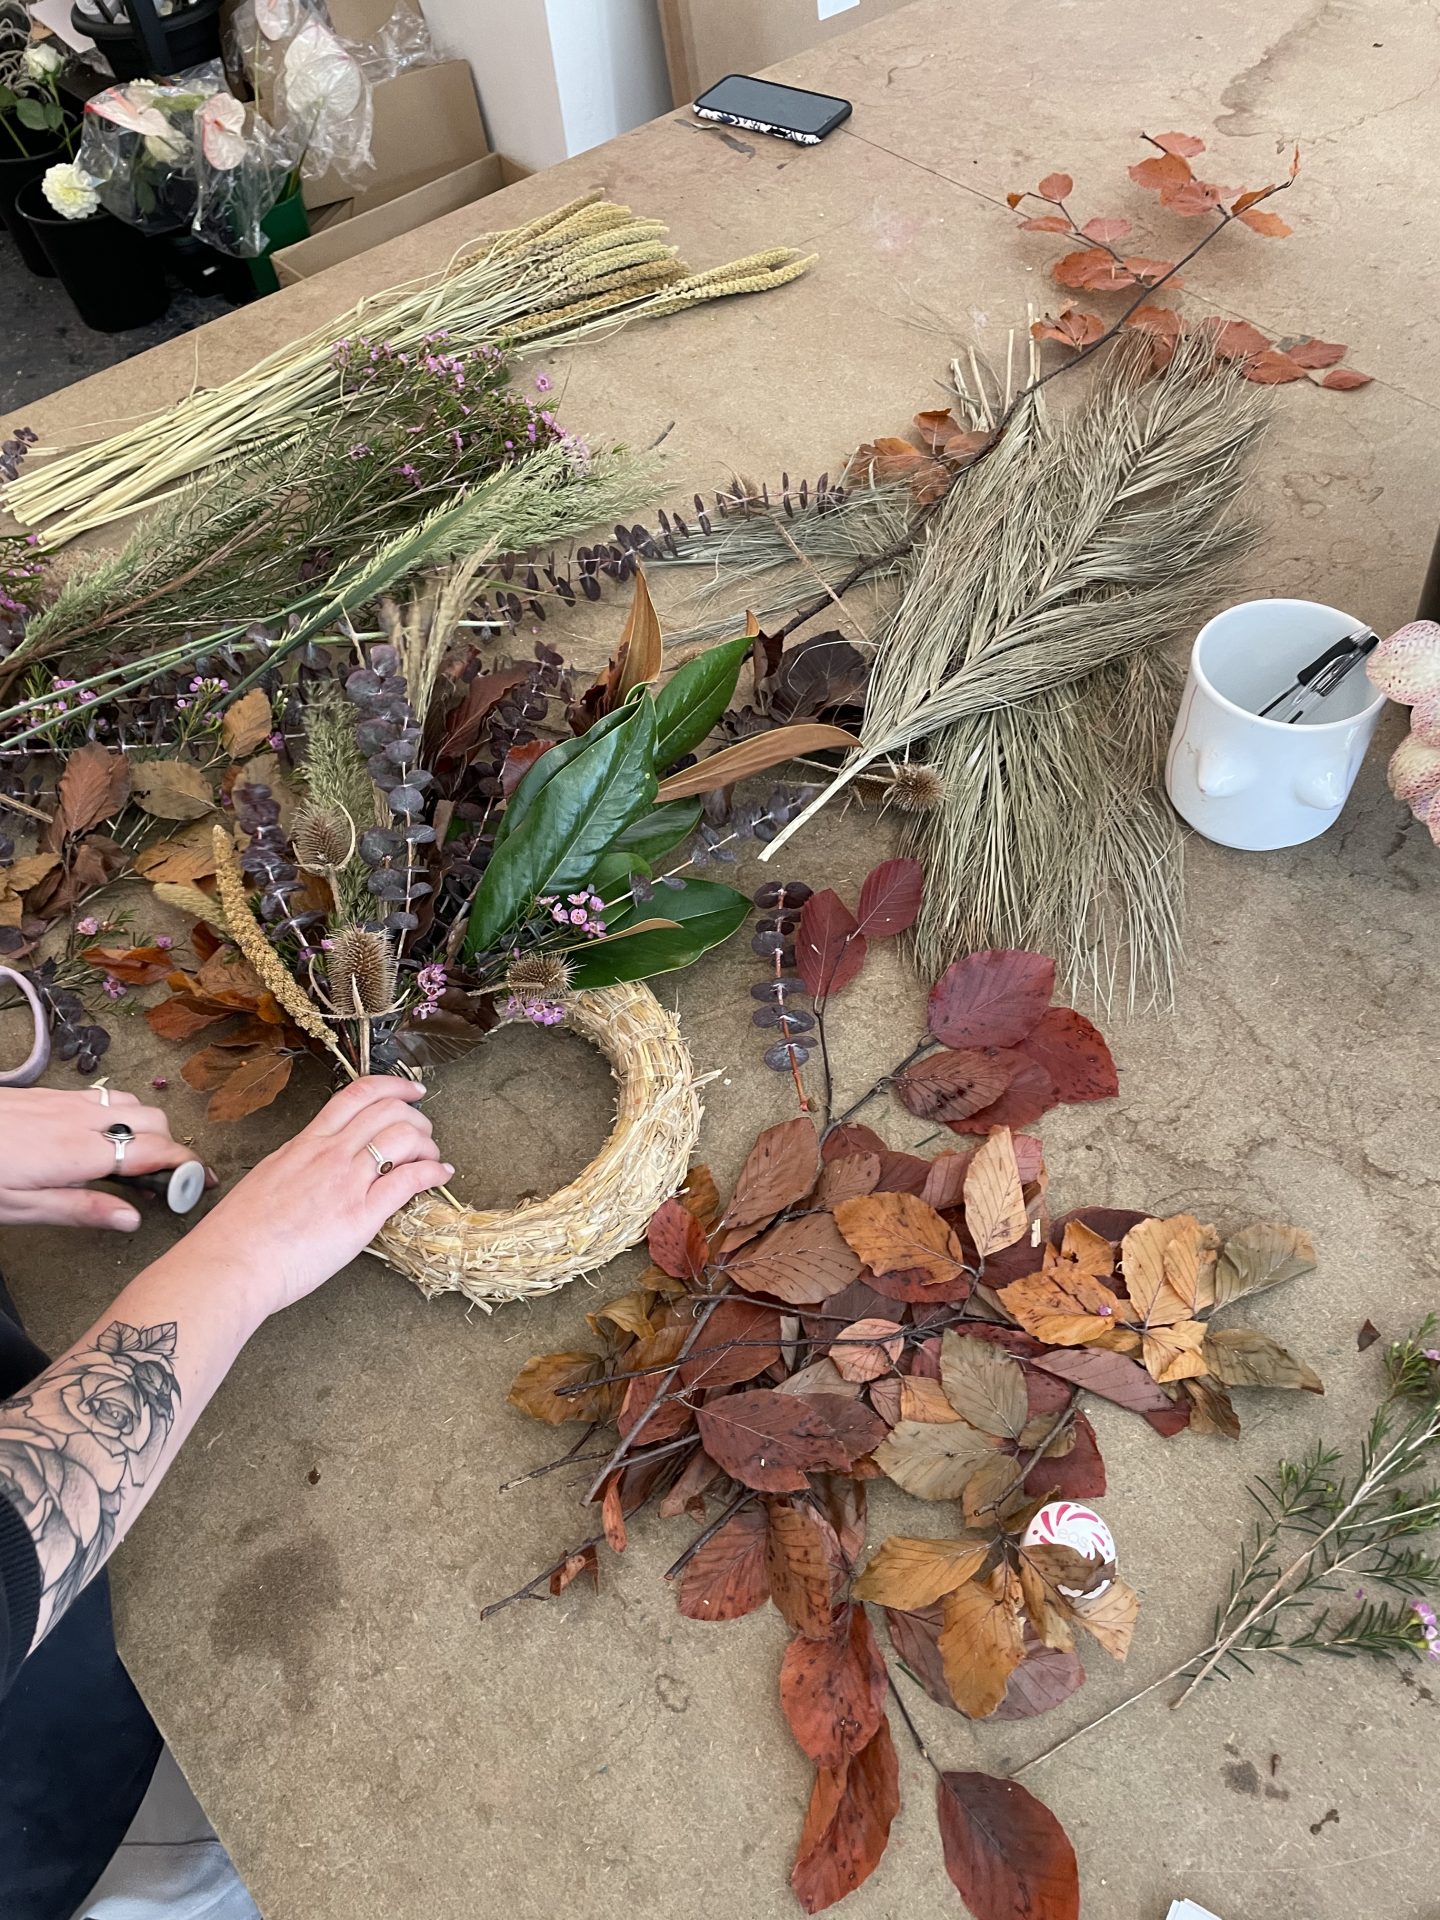
3. Continue to add greenery and foliage.

Start to fill your wreath. Once you’ve filled around a quarter of your wreath, begin to add greenery to another section and repeat step two. Continue to do this until the wreath looks full.
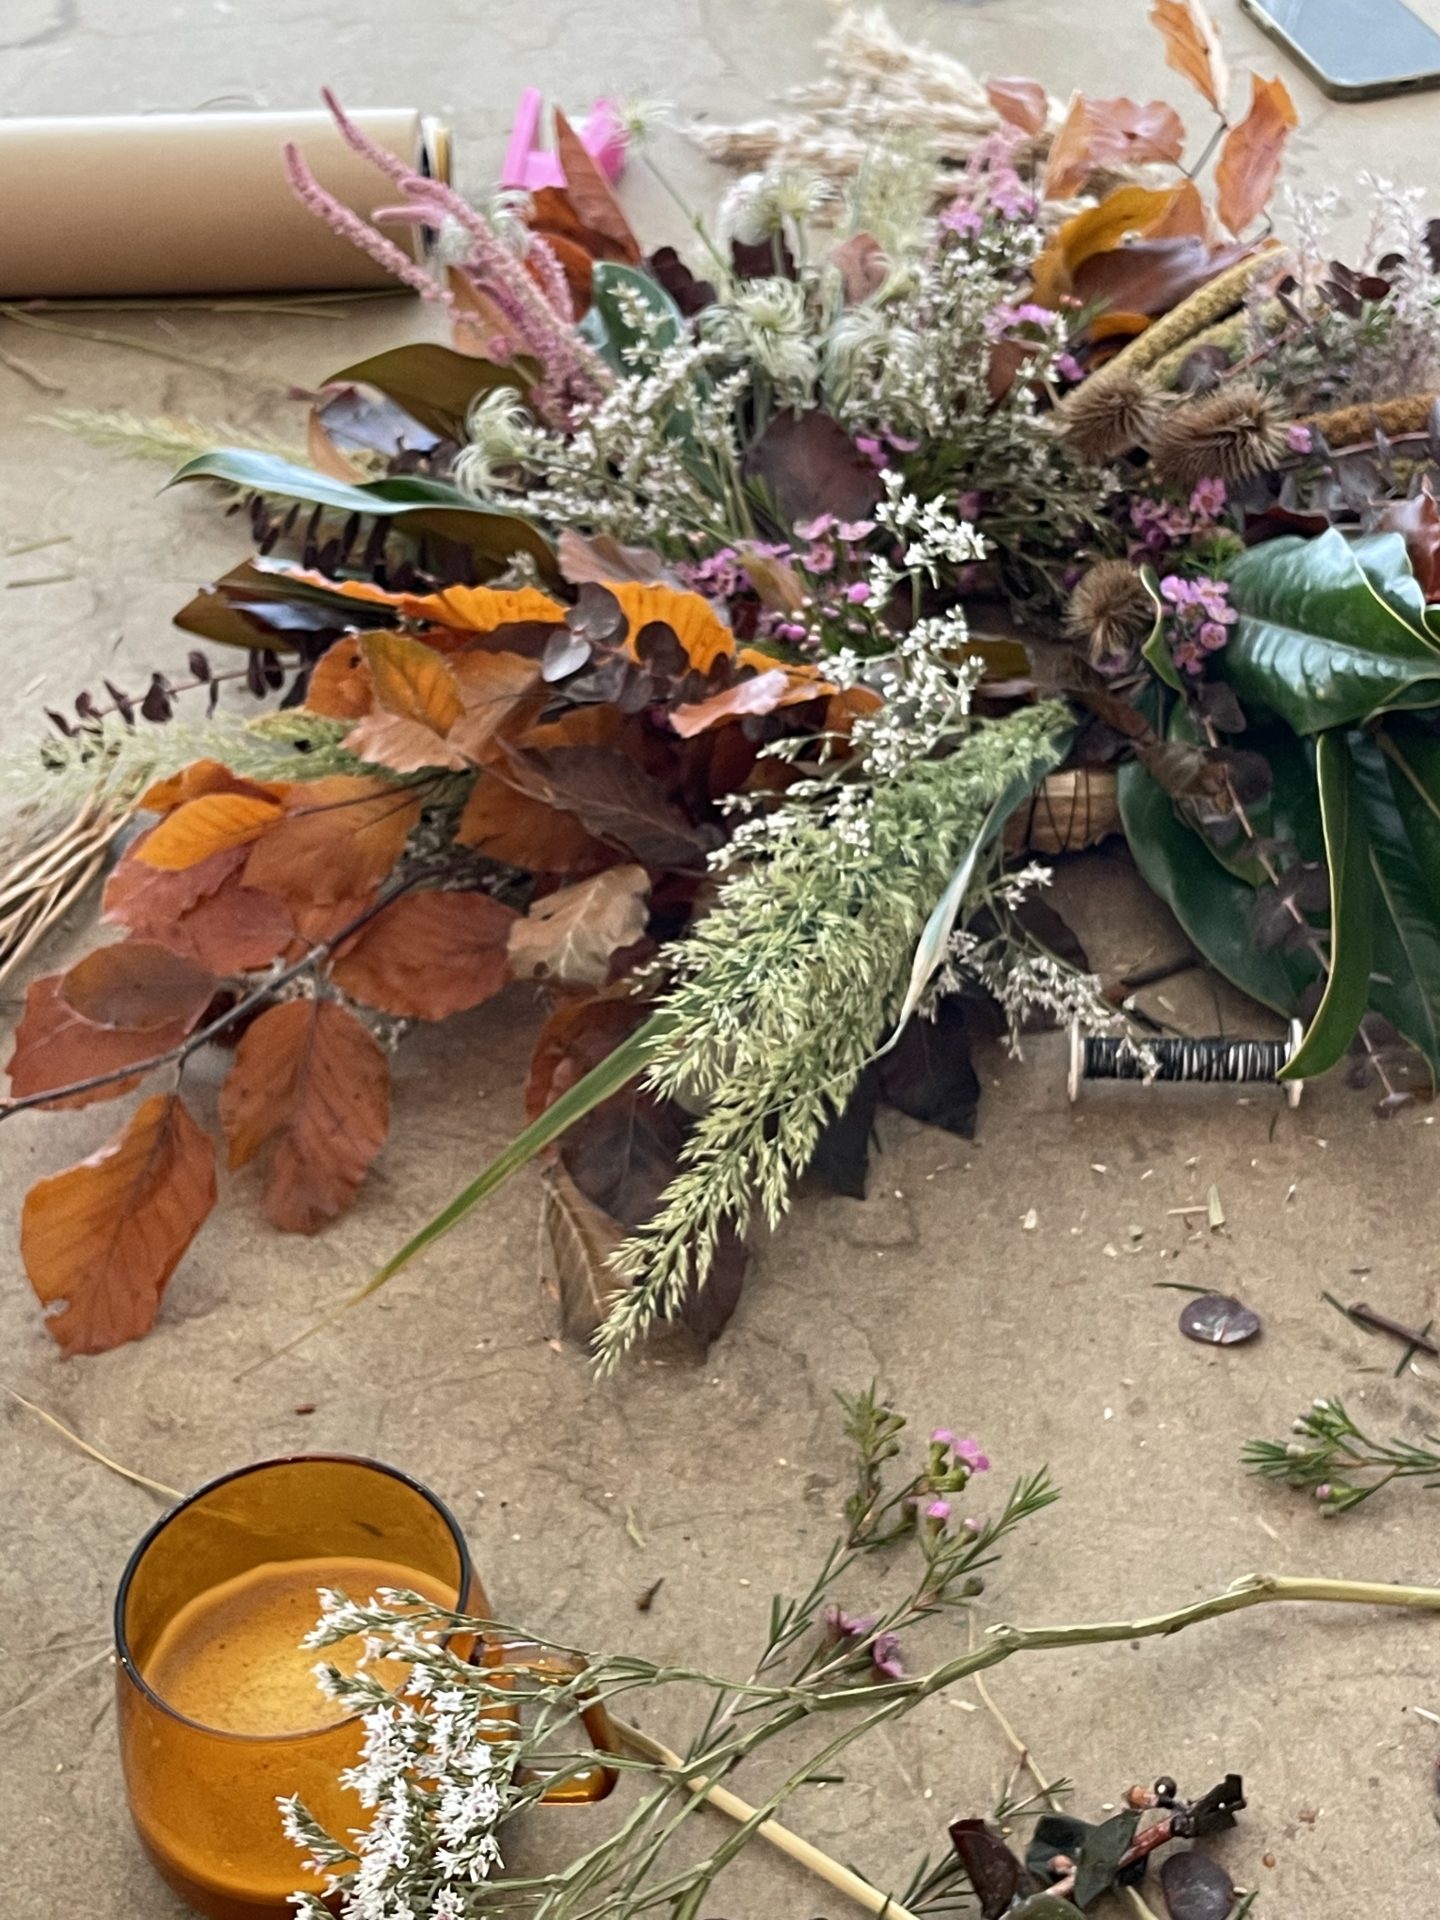
4. Examine your wreath.
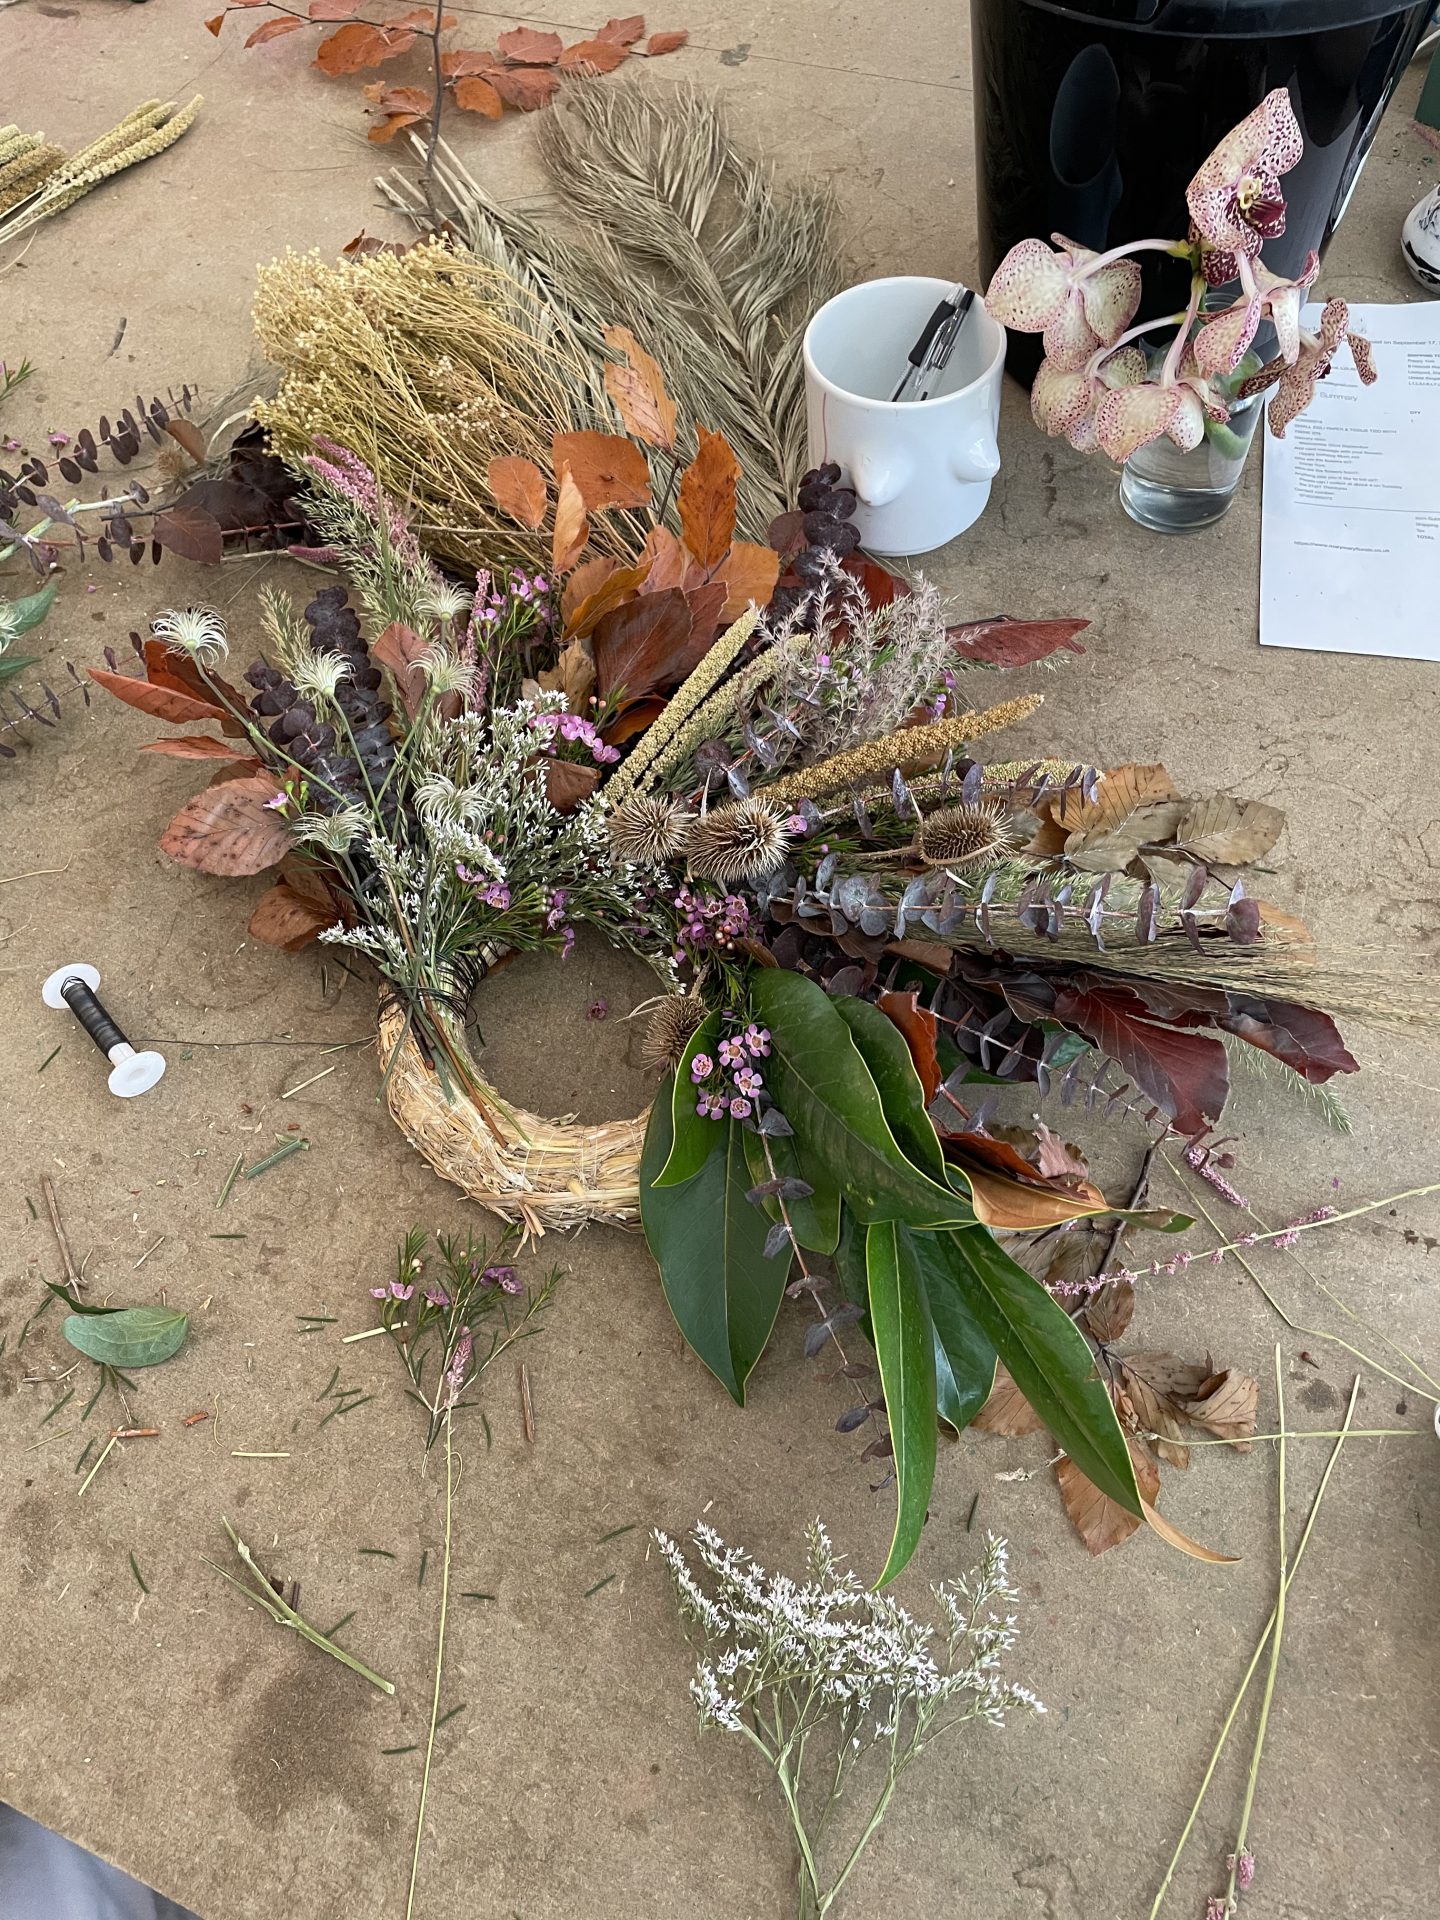
Reflect on your wreath regularly. As you’re adding to your wreath, move it around and hold it up so you can see what it looks like from different angles. This will help you see if any areas need more of a certain colour or texture.
5. Finish by cutting your wire.

Cut your wire. When you’re happy with your wreath, cut the string of wire you’ve been wrapping round the wreath, leaving a few centimetres of space at the end. Tie the end of the wire around itself so it’s knotted and the wreath is held firmly in place.
6. Add a hook to your wreath.
The finished wreath. Add a hook to your wreath so you can hang it up (some will easily hang by the centre of the wreath). Do this by attaching a curved piece of wire to the back of the wreath and looping a piece of string around the wire to hold it up.
Anna’s expert tips for perfecting your autumn wreath
Choose a colour scheme
You can use more than three different types of flowers but Anna recommends not using more than three colours so you don’t risk overwhelming the wreath and making it look messy.
Opt for both fresh and dried flowers
Fresh flowers are commonly used to decorate Christmas wreaths but dried flowers work well for autumn wreaths because the washed out tones suit the season. However, you can also use fresh flowers and allow them to dry while they’re on the wreath. “Autumn leaves dry really well and so do hydrangeas,” Anna says.
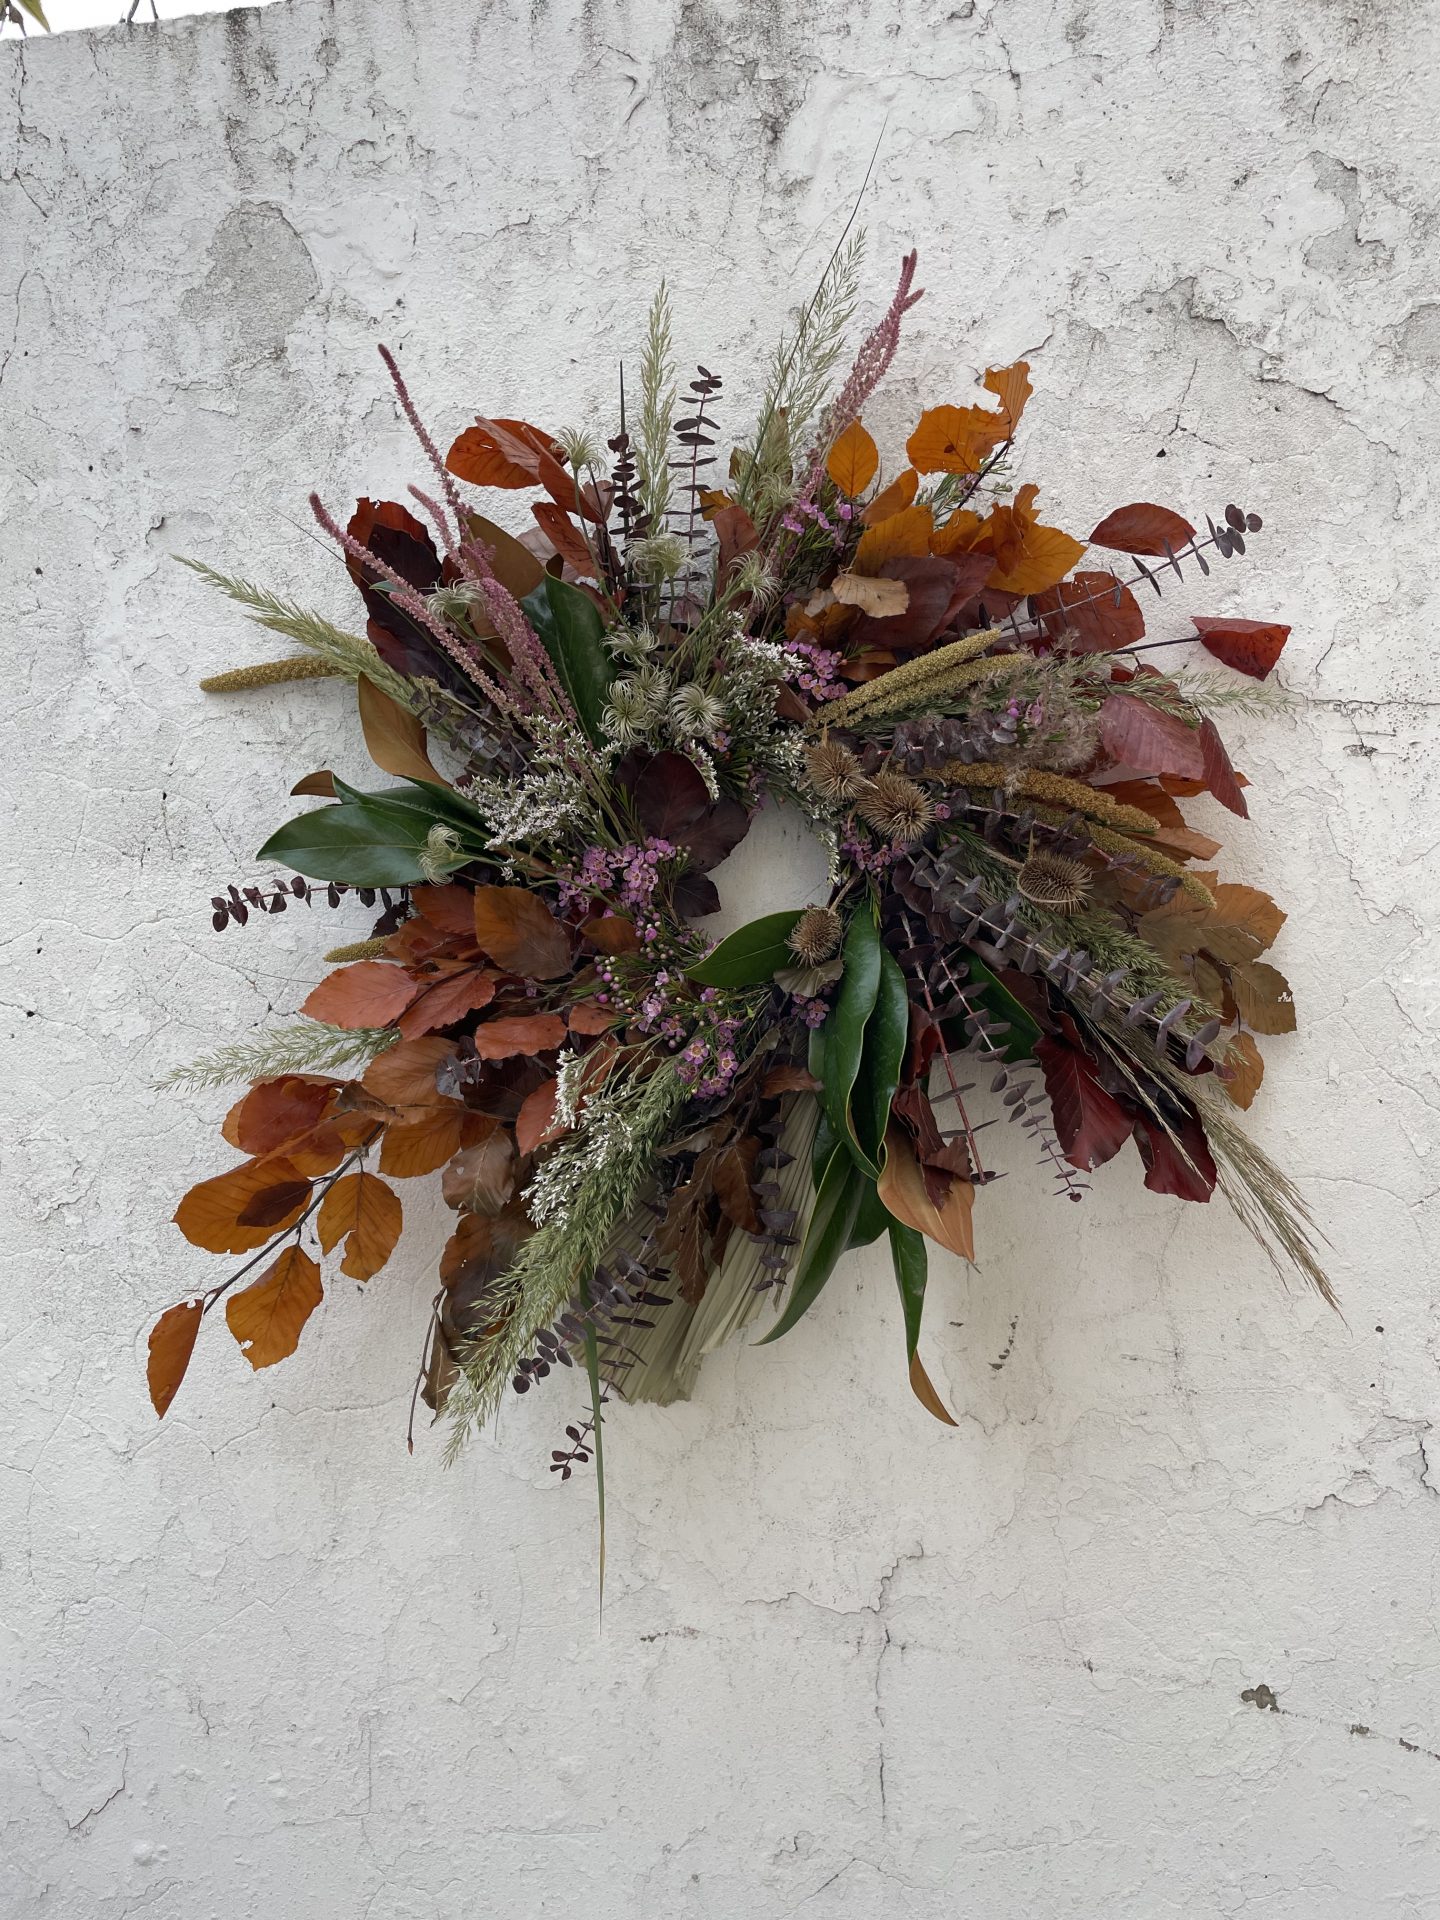
Play around with textures
As well as using varied colours, it’s important to use different textures in your wreath to give it body. “Keep moving your wreath around and looking at it from different angles so you can see if any areas are lacking character,” Anna says. “You can also change your mind about which bit of the wreath should be the centrepoint by doing this.”
Source: Read Full Article